A good backpack is more than a bag you carry. When learning how to design a backpack, smart design improves comfort, balance, and ease of use. When the shape fits your body, and the weight is in the right spot, it eases stress on your shoulders and back. A well-planned layout also makes items easy to find, which helps in daily use. For beginners, hobbyists, DIY learners, and students, understanding backpack design builds strong basics. Quick steps can help a lot. Sketch your ideas, choose the right fabric, and plan strap placement. A basic pack can perform well when you plan each part with attention to detail. Experienced designers rely on tested ergonomics, not guesswork. They use real user feedback and build a prototype to check comfort and balance. When you sew a sample and test it, you can spot weak seams and fix problems early. This hands-on method creates a sturdy and cosy backpack. It works well for daily use.
Step 1:Planning & Research: Know Your Audience and Purpose
Good planning is the foundation of successful backpack design. Know who will use the backpack and why before picking materials or starting any drawings. A school backpack has a distinct design compared to a hiking or travel backpack. It looks unique and serves different functions. Designing with a clear purpose makes each decision simpler and more practical. Professional makers often say that the best results come from user-focused planning. Many brands test ideas based on designers. These designers look at how people use products, move their bodies, and live their daily lives. This approach reduces mistakes and improves comfort, durability, and usability from the start.
Identify Your Backpack Type
First, decide what type of backpack you want to create. Each type has a different use and layout.
| Backpack Type | Main Use | Key Features |
|---|---|---|
| Daypacks | Daily errands or short trips | Lightweight, simple storage |
| Hiking backpacks | Outdoor and trail use | Strong fabric, support, weather resistance |
| Urban backpacks | City and work use | Clean look, easy access |
| Laptop backpacks | School or office | Padded laptop area |
| Travel backpacks | Long trips | Large capacity, smart compartments |
For example, a small backpack for daily use needs less storage but better comfort. A hiking pack may use Cordura fabric for strength and long life.
Understand User Needs
Every user expects four basic things from a backpack:
- Comfort: Proper padding, balanced weight, and well-placed straps.
- Storage: Enough space and smart compartments
- Durability: Strong fabric, clean stitching, and secure joints.
- Style: A look that fits the user’s lifestyle
Designers often test how straps attach to the body and how weight spreads across the back. They also check how each panel supports the structure. Small details, like using quality webbing, improve strength and long-term use.
Research Competitors and Trends
Studying competitors helps you avoid common mistakes and spot new ideas. Look at popular brands and note how they design pockets, straps, and openings. This is great if you want to create custom backpacks for a group, like students or travellers. Trends also matter. Many modern designs focus on lighter weight, clean looks, and smart storage. Creating a second drawing after research sharpens your idea. It also boosts functionality before you proceed. Good planning makes sure your backpack fits your needs and works well every day.
Step 2: Choosing Materials: Durability, Budget, and Eco-Friendly Options
Material choice plays a major role in how a backpack looks, feels, and performs. The right material improves durability, controls weight, and keeps costs under control. It also impacts comfort, especially as the bag gets heavier with daily use or travel. Designers choose materials based on real testing rather than trends. Carryology insights reveal that smart material choices often outweigh complex features. A good material should support the bag’s body. It must have strong stitch lines. It should also work well with parts like the zipper, buckle, and attachment points. Measuring thickness, width, and strength keeps the backpack’s shape over time. Some brands use 3D modelling to test materials before production.
Common Backpack Materials
Different materials serve different needs. Below are the most commonly used options:
| Material | Common Use | Key Feature |
|---|---|---|
| Nylon | Daily and travel backpacks | Lightweight and strong |
| Polyester | School and casual use | Affordable and easy to clean |
| Canvas | Fashion and lifestyle bags | Thick and classic look |
| Recycled fabrics | Eco-friendly designs | Lower environmental impact |
Many hiking and travel backpacks have foam layers inside. These layers boost comfort and protect your items.
Pros and Cons of Each Material
Each material has clear strengths and limitations.
- Nylon resists tearing and handles moisture well, but it costs more.
- Polyester is budget-friendly, but its lifespan may be shorter.
- Canvas looks stylish but adds weight.
- Recycled fabrics help the environment, though availability may vary.
Designers often adjust material proportions to balance strength and weight. Designers might use thicker fabric at stress points, such as strap joints or the top handle.
Budget-Friendly Material Sourcing
You do not need expensive materials to create a good backpack. Many beginners get fabric from local sources or buy surplus rolls from suppliers. Testing a small sample before full use helps avoid waste. Focus on quality stitching and clean joins rather than costly add-ons. A strong stitch at key points often matters more than premium fabric alone.
Sustainable Material Choices
Eco-friendly options are becoming more common. Recycled polyester, organic cotton, and water-based coatings reduce environmental harm. These materials still work well with standard hardware like buckles and zippers. Choosing sustainable options shows responsibility. It builds brand trust and doesn’t raise costs much. Pick the right materials for a backpack that lasts. This way, it stays durable, comfy, and practical over time.
Step 3 Layout & Ergonomics: Create a comfortable and functional design
A smart layout decides how comfortable a backpack feels in real life. Effective ergonomics distributes weight evenly. This helps reduce pressure on your back and shoulders. Designers test backpacks in daily activities. They walk, commute, or hike to check how the layout works. This real-world testing helps make something that works well, not looks good. Many professionals start with a simple mockup before final production. This allows for easy iteration and helps you change problem areas early. A simple DIY test with home tools can give you useful feedback before finalising your design.
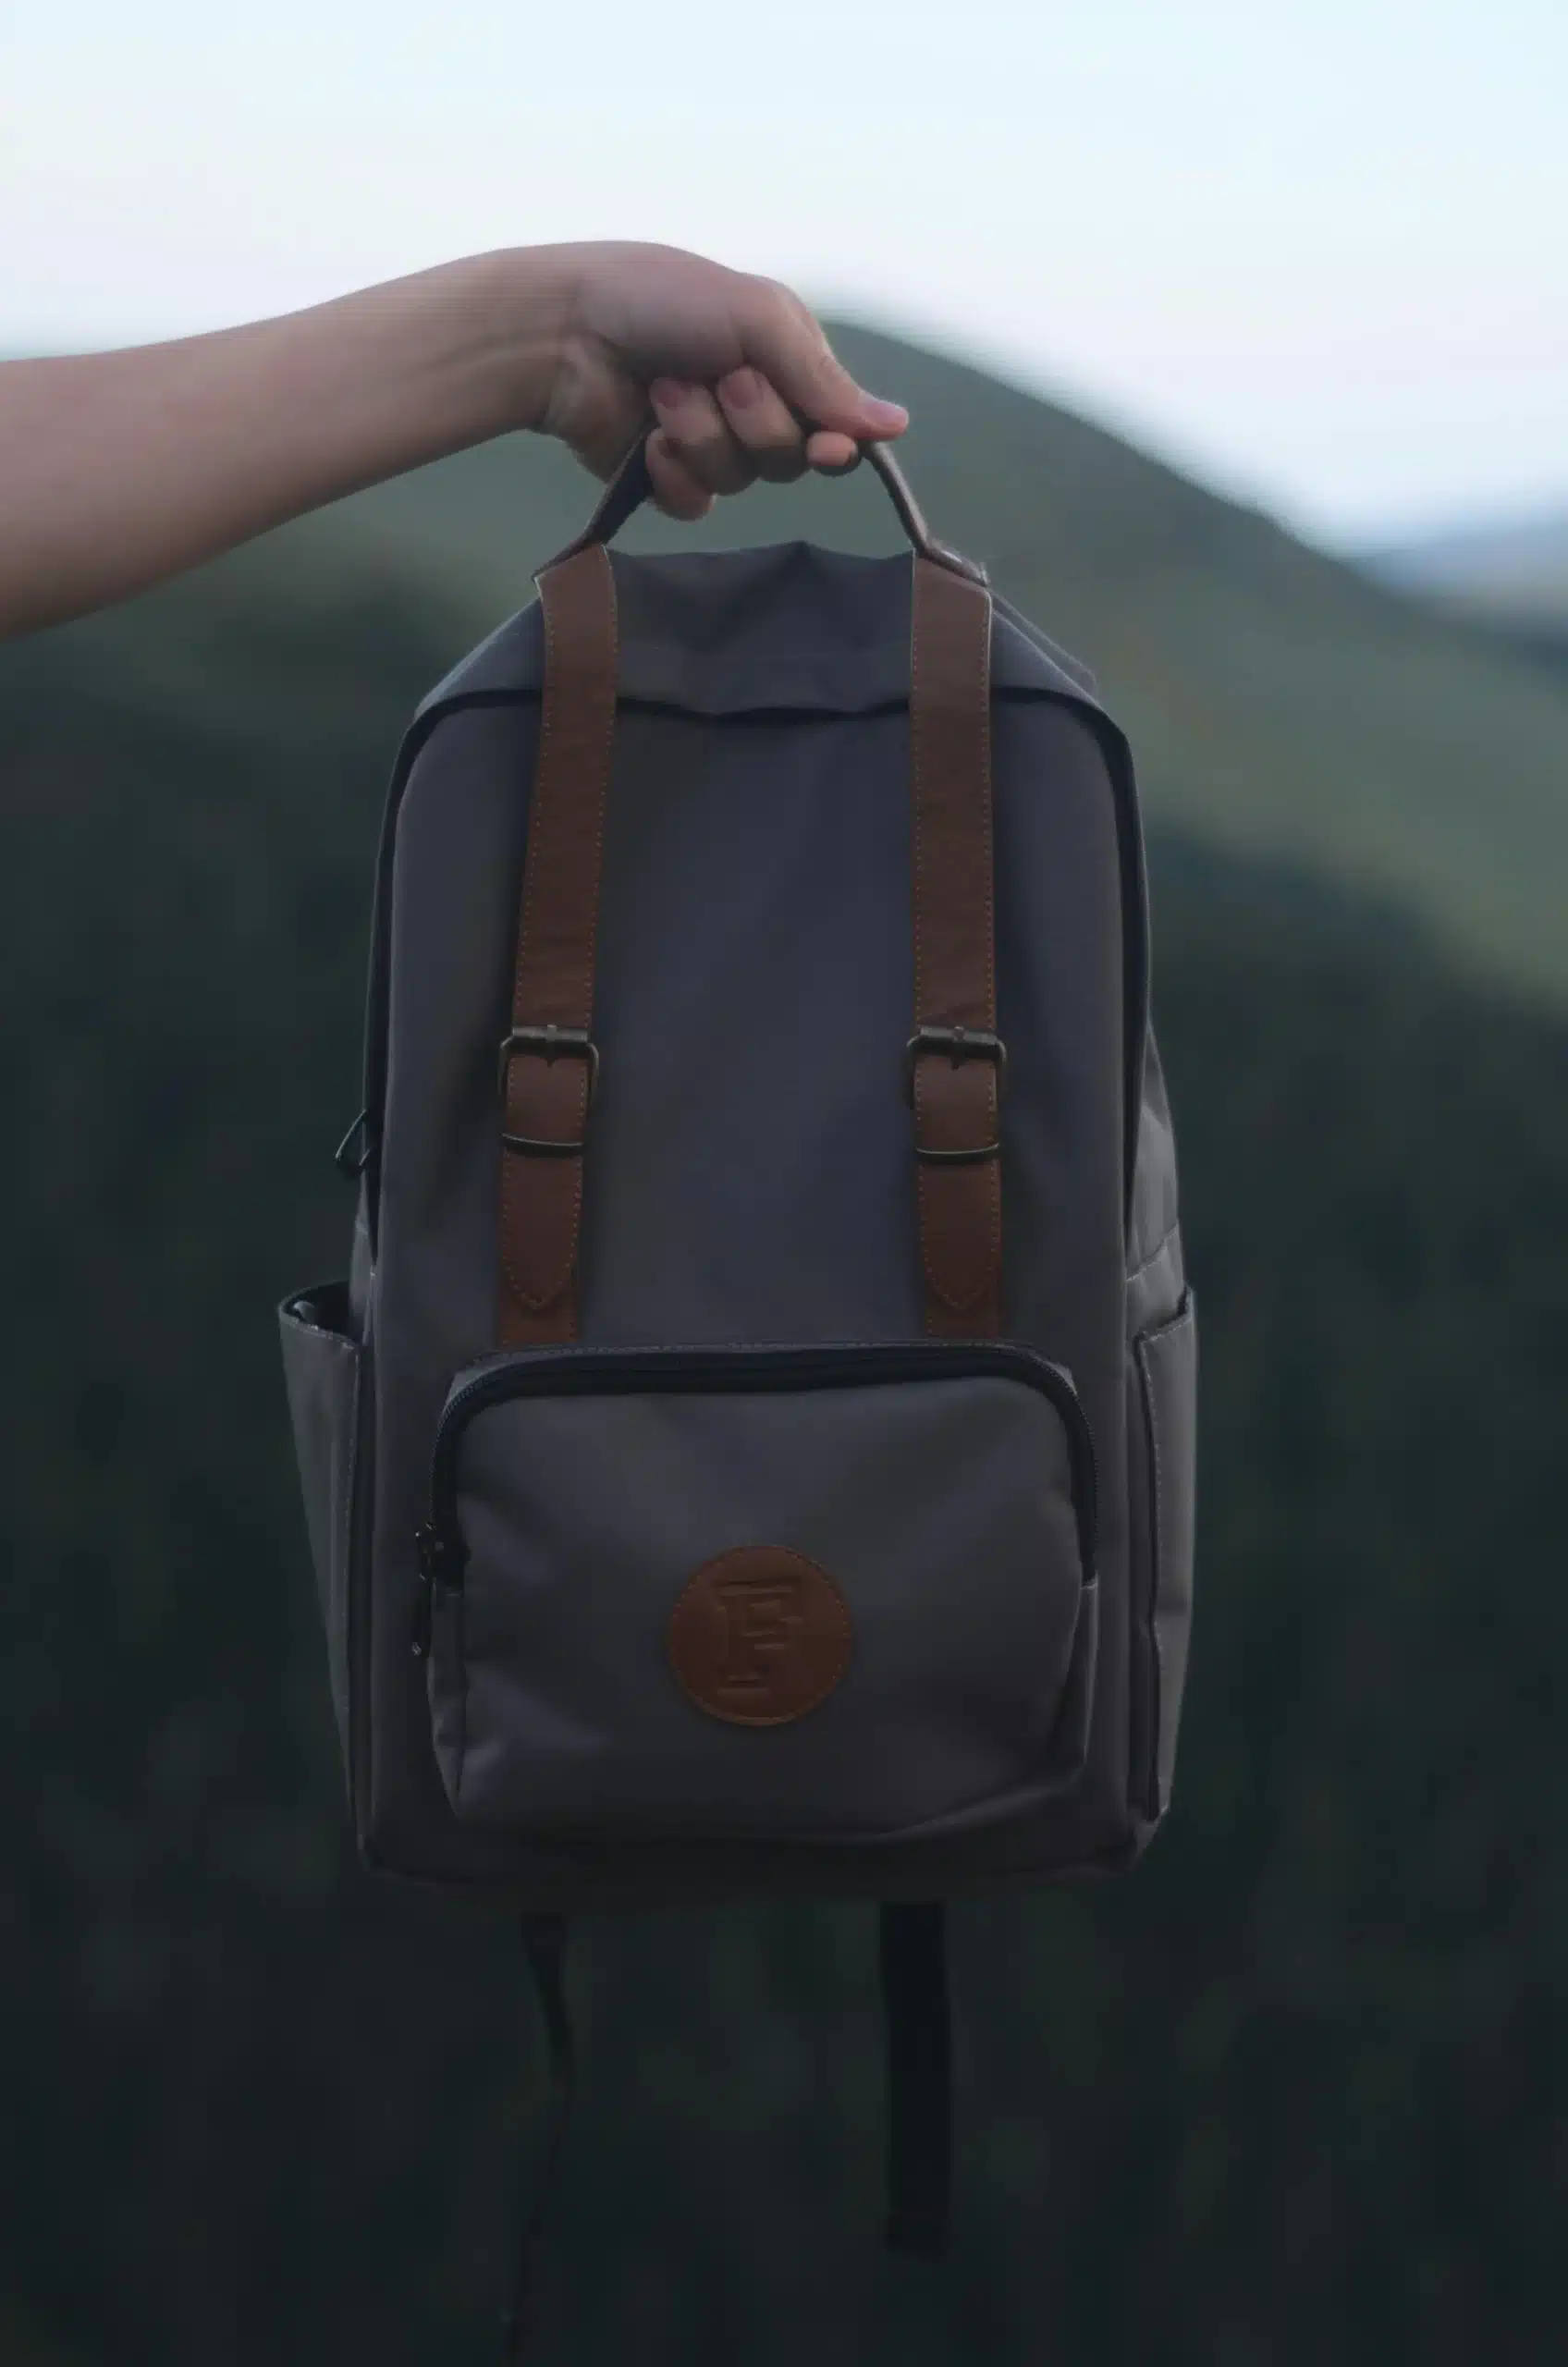
Straps and Back Support
Straps play the biggest role in comfort. Well-designed shoulder straps spread weight evenly and reduce strain. Padding made with mesh improves airflow and keeps the back cool. An adjuster allows users to change the strap length for a better fit. Designers often test strap comfort by walking with the bag for long periods. A climber, for example, needs strong support and flexibility when carrying gear. Testing with different body types helps improve balance and support.
Compartments and Storage Solutions
Storage design should match daily needs. A padded laptop sleeve protects electronics, while water bottle pockets improve convenience. A secure front pocket helps store small items for quick access.
Below is a simple storage planning table:
| Compartment Type | Purpose |
|---|---|
| Laptop sleeve | Protects devices |
| Bottle pocket | Easy hydration access |
| Hidden pocket | Stores valuables |
| Main compartment | Holds heavy items |
Designers often source feedback from users to improve storage layouts.
Accessibility and Ease of Use
Easy access improves daily use. Zippers should open without resistance and not catch on fabric. Adding Velcro inside pockets helps keep items in place. Small details like pocket angles and opening sizes matter more than people think. Testing access while standing, walking, or sitting shows how easy the bag is to use.
Weight and Stability Considerations
A backpack must stay stable when loaded. Place heavier items close to the back to reduce strain. Poor balance causes discomfort and faster fatigue. Testing with books, tools, or gear helps find weak points. Many designers test early versions using a sewing machine and leftover scrap fabric. This hands-on testing improves stability before final production. A well-balanced layout makes the backpack comfortable for long hours of use.
Step 4: Prototyping & Testing Your Backpack Design
Prototyping helps turn an idea into a real product. Beginners and pros use this step to check comfort, strength, and daily use. A test backpack shows how the design works during a commute, short trips, or outdoor use. Testing early saves time and costs later. Many designers start with a simple base version. They do not focus on looks at first. They focus on function, fit, and balance. This method helps to catch problems before final production.
DIY Prototyping Techniques
You can start with paper mockups to understand size and shape. Next, move to fabric samples using low-cost materials. This approach keeps the process lightweight and flexible. Some designers test special styles like a roll-top closure to see how easy it is to open and close. When you sew a sample, use a strong needle and ensure each knot is tightly secured. Simple patterns work best at this stage. Advanced users may test fabrics like XPAC or 1000D material to check how durable the bag feels. Many outdoor brands test strength with stress tests. They name these tests after strong animals, like rhinos. They measure tear resistance.
Ergonomic Testing
Ergonomic testing checks how the backpack fits the body. Load the bag and walk to see how the weight spreads across the shoulders and torso. Check if the straps dig in or stay comfortable over time. Test in different situations, such as walking upstairs, standing, or cycling. This shows how stable the bag remains during movement. Designers also check visibility for urban use. They want zippers and openings to be easy to find in low light.
Iterative Refinement
After testing, make small changes. This process is called iteration. You may adjust strap placement, pocket depth, or the base shape. Some designers use two layers of fabric in high-stress areas to improve strength. User feedback matters. A simple comment from a tester can help improve balance or comfort. Small changes, like adding a dart to shape the back panel, can greatly improve fit. Prototyping and testing make a backpack feel natural and fit into daily life.
Step 5: Customisation & Branding
Customisation turns a basic backpack into a product people remember. Strong branding helps users connect with your design and trust its quality. Designers use customisation to add identity while keeping comfort and function intact. Visualising the branding element on the finished bag helps you see its impact on daily use. Good customisation never weakens structure. Every logo, pocket, or colour choice must support long-term durability and user comfort.
Logos, Prints, and Embroidery
Logos and prints give a backpack its identity. Embroidery works well on strong fabric, especially when reinforced with two layers underneath. This prevents tearing over time. Many designers place logos at the front or top. They avoid stress points, like where the strap attaches.
Below is a simple comparison:
| Branding Method | Best Use | Key Benefit |
|---|---|---|
| Lightweight designs | Low cost | |
| Embroidery | Premium look | Long-lasting |
| Patch | Easy replacement | Flexible style |
Designers often try various materials, such as 500d Cordura and 330d fabric. They want to find out which one displays branding the best.
Limited Edition or Themed Designs
Limited designs help products stand out. Themes may reflect travel, school, or outdoor use. Some designers recreate popular colourways with small updates to stay fresh. Adding features like a hidden compartment or an external shock cord increases functionality. These elements also help keep the design unique. Before finalising, designers check extra costs for special fabrics or details. This helps keep pricing realistic.
How Branding Influences User Perception
Branding affects how people judge quality. Clean design, strong materials, and smart layout build trust. A backpack that looks organised and well-made feels more reliable to users. Strong branding also signals professionalism, even in small-scale projects.
Case Study: Successful Backpack Brands and Unique Features
Many well-known brands focus on simple layouts, tested materials, and clear branding. They keep things tidy and position logos to enhance the design, not distract from it. Their success proves that a strong identity and good function create lasting appeal.
Step 6: Manufacturing & Tools for Beginners
Manufacturing turns your design into a real product. Beginners often decide to either produce items at home or partner with a factory. Each option has benefits and limits. The right choice depends on budget, skill level, and production goals. Designers say that starting small cuts down on mistakes. It also helps build a strong foundation before expanding.
Essential Tools for Backpack Making
You do not need advanced equipment to begin. Basic tools help you build, test, and improve your backpack.
| Tool | Purpose |
|---|---|
| Sewing machine | Joins fabric parts securely |
| Scissors | Cuts fabric cleanly |
| Measuring tape | Ensures accurate sizing |
| Cutting mat | Protects surfaces and improves precision |
Accurate measurement helps maintain balance and comfort. Many designers first visualise the final shape before cutting to avoid fabric waste.
DIY Production Tips
DIY production works well for learning and testing. Start with simple designs and avoid complex features early on. Use 2 layers of fabric only in high stress areas to save costs and effort. Keep stitches clean and reinforce the strap attachment for strength. If something feels uncomfortable, modify the layout before final sewing. Testing closures like a roll-top on a sample helps you understand the ease of use. Always check how the weight pulls on the body of the bag when loaded.
Professional Manufacturing Insights
Professional factories follow a clear process. They cut fabric using templates, sew sections in stages, and assemble parts carefully. Each step goes through quality checks. Manufacturers also calculate material use and labour time to control costs and consistency. Carryology shows how top brands boost quality through repeated testing and expert assembly.
Step 7: Marketing & Selling Your Backpack
Once your backpack is ready, the next step is getting it in front of buyers. Marketing helps people understand why your backpack is useful and different. You do not need a big budget to start. Many hobbyists and small designers sell well. They use simple platforms and clear messages. The key is trust. Buyers want to see real value, clear photos, and honest details. When you explain your process, it builds trust. Showing how the backpack solves a problem also helps. This makes people more confident in buying from you.
Crowdfunding and Pre-Sale Platforms
Crowdfunding platforms help you test demand before mass production. They also help raise funds.
| Platform | Best For | Why It Works |
|---|---|---|
| Kickstarter | New product launches | Builds early trust and excitement |
| Indiegogo | Flexible funding | Works for small batches |
| Etsy | Handmade and custom items | Easy setup and direct buyers |
Share your story on these platforms. Show how you use the backpack. Highlight its comfort, storage, and durability. Clear goals and honest timelines build buyer confidence.
Social Media Marketing
Social media is one of the easiest ways to promote a backpack. You do not need paid ads to start.
- Instagram: Share photos, short videos, and behind-the-scenes work.
- Pinterest: Post clean product images and design ideas.
- TikTok: Show packing demos, daily use, and testing clips.
Posting real content works better than perfect content. Show how the backpack fits into daily life. Answer comments and messages to build trust with your audience.
Presenting Your Product
A good presentation increases sales. Clear photos help buyers understand size, shape, and features. Take photos in natural light and show the backpack from different angles.
When writing product descriptions:
- Explain who the backpack is for.
- List key features clearly.
- Share what makes it different.
Focus on benefits, not features. For example, explain how a padded back improves comfort or how smart pockets save time. A clear presentation helps buyers choose your product with confidence.
Step 8: Common Mistakes
Many beginners make similar mistakes when designing a backpack. These errors often affect comfort, strength, and daily use. Learning about them early helps you avoid costly fixes later.
Here are the common mistakes in backpack design summarised by key factors:
- Ergonomics: Straps that are too short or long, poor back padding, and uneven weight can make the backpack uncomfortable.
- Compartments & Storage: Too many pockets or poorly placed ones make items hard to reach. This reduces usability.
- Materials: Using cheap fabrics that tear easily, skipping water resistance, and picking low-durability materials can shorten the bag’s lifespan.
- Weight & Stability: Placing heavy items too far back or having unbalanced loads can cause strain. Weak support at stress points also leads to instability.
- Closures & Attachments: Weak zippers, loose straps, and slipping buckles can impact safety and comfort.
- Comfort: Narrow straps and no padding make the backpack hard to carry. A poor torso fit adds to the discomfort.
Step 9: Tools & Templates for Easier Backpack Design
Designing a backpack can be easier and faster with the right tools. Digital tools and templates help you plan layouts and test ideas. You can see how the backpack will look before cutting the fabric. They save time, reduce mistakes, and make your design process more professional. Many designers use these tools to test ideas without wasting materials.
Free Tools for Layout Planning
Several free tools are beginner-friendly and can help you plan your backpack design:
- Canva: Great for simple sketches, colour schemes, and layout ideas.
- Adobe Illustrator (free trial): It helps you create detailed digital drawings of your backpack, including compartments and straps.
- Sketch: Useful for visualising many angles and design layers.
- Free mockup software: It lets you add logos, prints, and patterns to a virtual backpack. This way, you can see how they look in real life.
These tools let you experiment with designs. You can change proportions and try different compartment layouts. Best of all, you don’t need to sew a single stitch.
Digital Prototyping Tips
Digital prototyping helps you visualise the backpack before making physical samples. You can recreate compartments, straps, and closures to see how they fit together.
Tips for effective digital prototyping:
- Start with a simple layout to define the main compartments.
- Use layers to separate straps, pockets, and panels for easy adjustments.
- Experiment with sizes and positions to ensure balance and accessibility.
- Test closures like zippers and pockets virtually to see if they are practical.
Using digital tools initially simplifies the process of physical prototyping. This also cuts down on wasted fabric and materials. It helps beginners and small designers quickly try out various designs. They can do this with confidence.
Conclusion
Designing a backpack is both creative and practical. Every step matters. Start by planning and picking the right materials. Then, test prototypes and add your personal touches. Beginners should prioritise comfort, usability, and durability. Start with simple designs. Start small, test your ideas, and iterate. Pay attention to ergonomics, material choices, and real-world usability. Sustainable materials, good testing, and smart customisation help your backpack shine and endure. Now it’s your turn, start your backpack design today and test your ideas! Try new ideas, learn from them, and make a backpack that is practical, stylish, and uniquely yours.
Frequently asked questions
How do I make my backpack look aesthetic?
To enhance the aesthetics of the backpack, choose clean, simple colours and add stylish details such as elegant zippers, a minimal logo, or a unique texture that matches your style.
What materials help a backpack withstand everyday use?
The best material is durable and light. Nylon, polyester, canvas, and even leather (in small areas) are popular options. They provide a good balance between strength and comfort.
Can I design a custom backpack with my logo?
Yes! Many companies offer customised backpack services where you can add a logo, colour, and even unique pockets. It’s great for brands, teams, or gifts.
How do I create spatial organisation inside my backpack?
Use smart compartments and pockets to improve the spatial layout, making it easier to pack and find your things quickly.