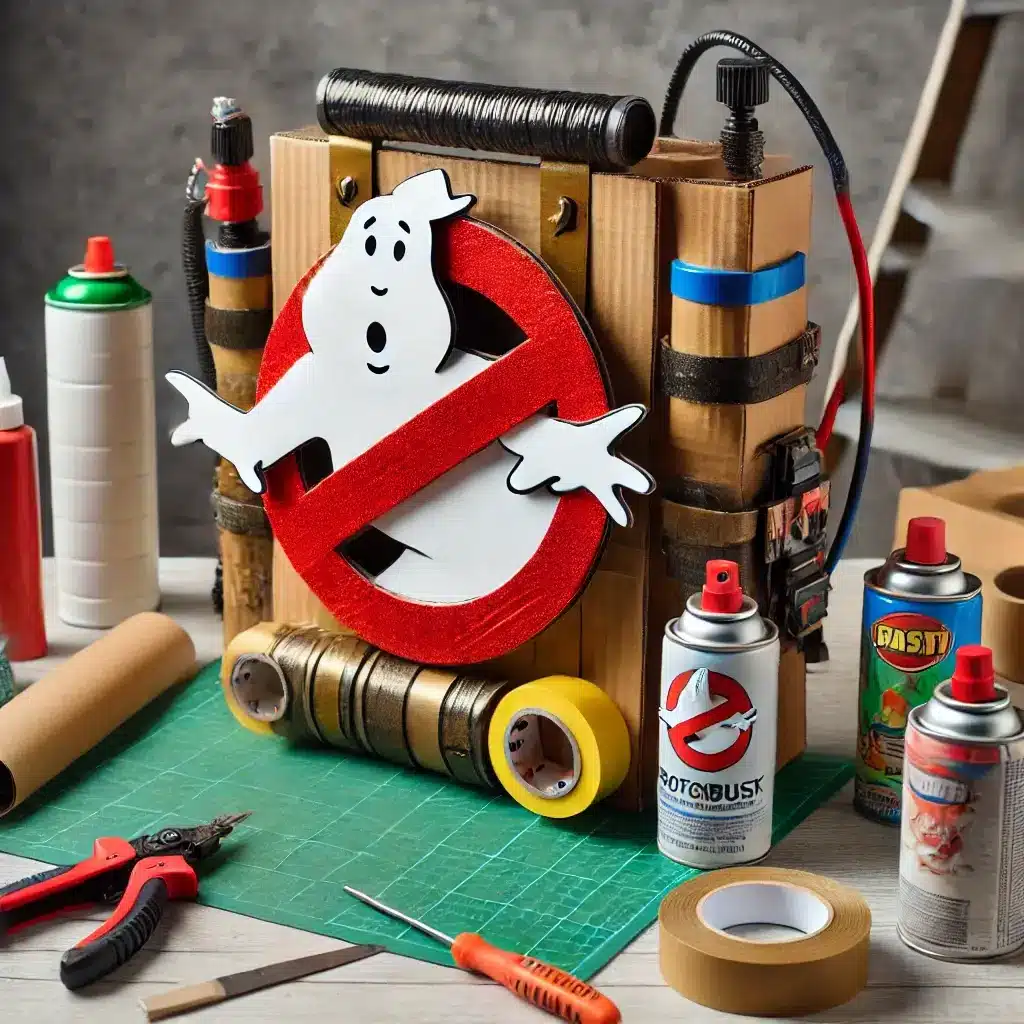
Ever wanted your own Ghostbusters proton pack but thought it was too complicated? No need to worry! This DIY guide will help you make a proton-pack backpack. You’ll follow 14 easy steps. Plus, you can find supplies at Goodwill, the Dollar Store, and Instructables. You don’t need fancy tools—just some cardboard, duct tape, hot glue, washers, and colored wires to get started We’ll walk you through cutting the right shapes, assembling the cyclotron, and adding a Neutrona wand and proton stream! Want to go as a Ghostbuster for Halloween? No problem! Just paint it black with cheap flat black spray paint, strap it on, and you’re ready to bust some ghosts. No need to worry about matching every detail—this is all about having fun and bringing your proton pack to life!
The Material You Will Need For Your Ghostbusters Proton Pack
Building a DIY proton pack doesn’t have to cost a fortune. You can create a small pack or a full-sized version. This will upgrade your costume without costing much. Just use some creativity and basic materials. Let’s go over everything you’ll need!
Budget-Friendly Supplies: Dollar Store & Goodwill Finds
If you have a budget, you can find most of these ingredients:
- Dollar Store – Grab glue, tape, spray paint, and plastic containers for details.
- Goodwill – Look for old backpacks, toy parts, or electronics to repurpose.
- Recycling Bin – Use cardboard, bottle caps, and wires for extra details.
💡 Tip: Don’t stress about getting every detail perfect—just focus on getting the right size and overall shape!
Essential Tools: Glue, Tape, and More
To assemble your Ghostbusters proton pack, you’ll need:
- Cardboard – The base structure for your pack.
- Glue Gun – Essential for sticking everything together.
- Duct Tape & Masking Tape – Adds strength and durability.
- Spray Paint (Black & Silver) – Use cheap flat black spray paint to give your pack a realistic look.
- Plastic Containers or Lids – Used for the cyclotron and round details.
- Doodads & Capacitors – Small parts like buttons and wires to enhance the design.
- Yellow Lights – Optional, but adds a cool glow effect.
- Back Pack Straps – To comfortably wear your proton pack.
💡 Tip: If you want a pack with magnets, you can attach magnets inside so certain parts are removable or adjustable!
Choosing the Right Materials for Durability
Your proton pack should be lightweight but sturdy. Here’s how to make sure it lasts:
- Cut Open a strong cardboard base—avoid flimsy material. (I cut mine to fit over a backpack.)
- Reinforce with Tape & Hot Glue – Apply extra layers where needed.
- Attach Straps Securely – A loose strap can ruin your hard work!
- Seal Paint with a Clear Coat – Helps prevent scratches and wear.
Connecting the Pack for Wearability
To make sure your proton pack is wearable and secure:
- Connect the pack using glue, tape, and screws for durability.
- Adjust the backpack straps for comfort.
- For a small-sized pack, use lightweight materials.
Step-by-step guide: How to build a DIY Ghostbusters Proton Pack
It may seem difficult to make a Ghostbusters Proton package, but don’t worry! Follow these 14 simple steps to make your pack using budget-friendly materials like cardboard, duct tape, and spray paint. This guide will help you fix them and upgrade your pack to look just like the real thing.
Step 1: Cutting the Base for Your Ghostbusters Proton Pack
Start by cutting cardboard to form the base of your DIY proton pack. Make sure it’s the right size for a comfortable fit, and reinforce it with hot glue and duct tape for durability.
✅ Key Factors:
- Used mainly cardboard for a lightweight and sturdy structure.
- Cut mine to fit properly before assembling.
Step 2: Assembling the Main Body of the Proton Pack
Stack cardboard boxes, plastic containers, or foam pieces to create the main section of your proton pack. Use a glue gun to hold everything in place and shape the structure correctly.
✅ Key Factors:
- Cut open cardboard to shape different sections.
- Make sure it’s a small-sized pack if needed for kids.
Step 3: Creating the Cyclotron – The Heart of Your Proton Pack
The cyclotron is the round part at the bottom of the pack. You can use plastic lids, CDs, or cardboard circles to make it. Attach them to the top of the pack securely with hot glue.
✅ Key Factors:
- The top of the pack needs to hold the cyclotron properly.
- Ensure it’s the right size to match real proton packs.
Step 4: Adding Details to the Proton Pack Power Unit
This step focuses on adding capacitors, doodads, and colored wires to make the proton pack power section look real. Secure them to various points on the pack for a more authentic feel.
✅ Key Factors:
- Attach doodads to match the details of real proton packs.
- Ensure capacitor placement is correct for realism.
Step 5: Connecting the Pack and Securing the Straps
Use a strong backpack strap to make your pack easy to wear. Reinforce the straps with glue and tape to ensure they stay secure while moving around.
✅ Key Factors:
- Make sure to properly connect the pack with secure straps.
- Test it for weight balance and comfort.
Step 6: Building the Neutron Wand Holder
The Neutrona wand is an essential part of the pack. Make one using PVC pipes or foam and attach it to the top of the pack using tape or Velcro for easy access.
✅ Key Factors:
- Ensure the wand stays attached but is easy to remove.
- Use a pack with magnets for quick attachment.
Step 7: Adding Realistic Details with Glue and Paint
Spray the pack with cheap flat black spray paint for a realistic look. Add highlights using silver or metallic paint to create a weathered effect.
✅ Key Factors:
- Paint it black for an accurate look.
- Use hot glue to attach small details securely.
Step 8: Making the Proton Pack Look Movie-Accurate
Check reference images or see the pictures of real Ghostbusters proton packs. Attach small parts like washers and doodads to match the details as closely as possible.
✅ Key Factors:
- Look at the pictures for guidance.
- Ensure various points on the pack have realistic details.
Step 9: Attaching the Wand and Final Adjustments
Secure the wand with straps or magnets so it stays attached but is easy to remove. Make sure it aligns with the pack for a professional look.
✅ Key Factors:
- Adjust the wand so it fits the pack properly.
- If necessary, cut mine to make it fit better.
Step 10: Adding the Proton Pack Power Features
For extra realism, install yellow lights or LED strips. These should be placed in various points on the pack to create a glowing effect.
✅ Key Factors:
- Add yellow lights for a true Ghostbusters look.
- Secure wiring so it doesn’t fall off.
Step 11: Connecting the Pack to the Wand
Use colored wires and washers to connect the Neutrona wand to the proton pack. Secure them properly with a glue gun to keep them in place.
✅ Key Factors:
- Make sure to connect the pack properly.
- Use capacitors and colored wires for accurate detailing.
Step 12: Reinforcing Weak Points with Glue and Tape
Check for any loose parts and secure them with extra hot glue. If you run into a couple of problems, don’t worry—just decide to fix them by reinforcing weak spots.
✅ Key Factors:
- Solve a couple of problems before finalizing.
- Apply hot glue where necessary for stability.
Step 13: Testing Your DIY Ghostbusters Proton Pack
Wear the pack and move around to ensure it’s comfortable and durable. If the pack took damage during testing, reinforce it with more tape and glue.
✅ Key Factors:
- If the pack took damage, fix it with extra reinforcement.
- Make sure it’s lightweight for long-wear
Step 14: Finishing Touches for a Complete Look
Add finishing touches like weathering effects, extra doodads, or small paint details. If you want a lightweight option, consider an inflatable proton pack instead.
✅ Key Factors:
- Add finishing touches to improve realism.
- Consider an inflatable version for kids or easier wear.
With these steps, you’ll have a Ghostbusters proton pack that looks fantastic and is easy to carry! 🚀👻
How to Wear & Use Your Ghostbusters Proton Pack Backpack
Now that you have built Ghostbusters Proton Pack, it is time to make sure it is comfortable to wear and is user-friendly to use. Dressing up as a Ghostbuster or an assistant? A well-fitted pack is essential. Let’s go over how to adjust the straps, attach the wand, and keep your pack lightweight.
Adjust the straps for a comfortable fit
Your backpack should sit on your back – not too loose, not too tight. If it bounces too much, tighten the straps. If it feels too tight, loosen them a bit. The goal is to make it look good, right?
✅ Key Tips:
- If you’re making a smaller-sized pack, adjust the straps for a better fit.
- Lightweight materials like miscellaneous bottle caps help reduce weight.
- If it still feels uncomfortable after a week, I realized it might need extra padding.
Attaching the Wand for Easy Access
You’ll want quick access to your wand, so it needs to be attached securely but still easy to grab. Velcro, hooks, or magnets work well to keep it in place.
✅ Key Tips:
- If you want it to look accurate, check several prints available online.
- Many builders stay true to the movie design, but do what works best for you.
- If you’re unsure where to place it, mouse over the picture in the reference guides for help.
Keeping It Lightweight for Comfort
Wearing a full-sized proton pack can get heavy, so try to keep it light. Swapping heavier materials for flashy kids’ toys can help.
✅ Key Tips:
- Use only the electronics that go inside if necessary.
- A circle of plexiglass adds detail without extra weight.
- If the pack still feels heavy, cut some holes in unnecessary areas.
Bonus: How to Add Lights & Sound Effects
Adding lights and sound effects to your Ghostbusters proton pack can take it to the next level. Whether you want to make something like a real movie prop or just a fun version for cosplay, the right details will make your pack stand out. The best part? You don’t need expensive tools—just some creativity, a few flashy kids’ toys, and basic electronics!
Simple LED Hacks for a Glowing Cyclotron
A full-sized proton pack wouldn’t be complete without its signature glowing cyclotron. Adding LEDs is pretty straightforward and can give your pack a realistic touch.
✅ Key Tips:
- Use red LED lights and position them onto the board inside the cyclotron.
- A 9V battery clip is perfect for powering your lights without extra wiring.
- If you want an interactive effect, connect a switch that turns off power when needed.
- Place LEDs at the bottom to give the cyclotron a bright, even glow.
Budget-Friendly Sound Modules for Realistic Effects
No proton pack is complete without the classic power-up and shooting sounds. Instead of expensive setups, you can use simple sound modules from toys or online stores.
✅ Key Tips:
- Repurpose flashy kids’ toys with sound effects—you’ll find useful parts inside.
- Use a 9V battery clip to power your sound module.
- A toy gearbox can create a humming effect, so check if there’s a gearbox in an old electronic toy.
- To keep everything working smoothly, set up a workbench and wire all components carefully.
Dollar Store Tricks for Extra Details
Want to add some extra details without spending too much? Dollar store items can be surprisingly useful!
✅ Key Tips:
- Used masking tape works great for covering rough edges and creating texture.
- Used more magnets to make detachable parts like the wand easier to handle.
- Parts have names, so look up reference images and mouse over the picture to match details.
- If you’re adding weight, glue small objects onto the board to balance the pack.
Conclusion
Building your own Ghostbusters proton pack in 14 steps is a fun way to upgrade the costume. Whether you’re making a small-sized pack or a full-sized one, using flashy kids’ toys makes it easier. The process is pretty straightforward—just mouse over the picture to guide you. Don’t be afraid to overdue details, and spray a little paint where needed. Keep the battery in place, and remember to check the bottom to complete the pack’s look. Now you’re ready to be the ultimate ghostbuster assistant! 👻
Frequently Asked Questions
How do I start building my Ghostbusters proton pack?
Building your proton pack is pretty straightforward. Start by gathering materials like flashy kids’ toys and cardboard. Then follow the 14 steps to bring your pack to life!
What if I make a mistake while building?
No problem! If something doesn’t fit, it’s easy to fix. Just remember, I’ve hot-glued parts that need extra hold, and you can always adjust. If it’s tricky, I’ll send you a patch or extra help!
Is it possible to make a proton pack?
Yes, it is certainly possible to create a proton package using simple materials such as cardboard, attractive children’s toys, and some creativity to build a full-size or small version.
What kind of jumpsuit do the Ghostbusters wear?
Ghostbusters wear a khaki color jumpsuit with a note on the shoulder and a name tag. It is simple, but excellent, which is often paired with a tool belt to keep the equipment.
Can I upgrade my package later?
Absolutely! You can always add more features such as light or extra decorations to upgrade the dress. If you want to improve it later, it’s easy to change things.